Account Allocation
GL > Account Allocation
Account Allocation allows for easier data entry in accounts payable and better control of expenses that need to be allocated to different departments within the company. For example, head office phone expense which need to be divided amongst the stores.
In AP, the invoice is not divided amongst departments; the full amount goes into the one GL account and in Account Allocation, you define the percentage that is allocated to a department. This allows you to review and modify the allocation on a regular basis without affecting the AP staff.
To Start the Account Allocation Utility:
- Go to GL > Account Allocation.
Using the Utility:
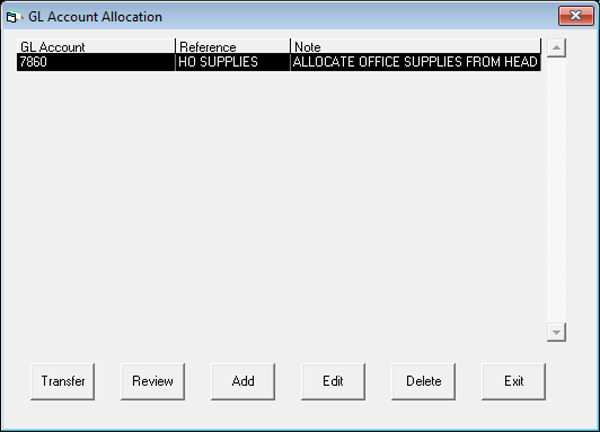
All buttons with exception of Add and Exit are only activated once a transaction has been selected.
Transfer: EPASS transfers (or writes) these transactions to GL transactions. EPASS accumulates the transactions for the original GL account based on the fiscal period selected and produces journal entries transferring the amounts to the appropriate GL accounts based on the allocation percentages. They are included in your next posting. The current report date is used as the transaction date. If you post entries to any of the ‘distribution accounts’ those entries will not be affected, only entries to the original GL account are distributed.
![]()
After you click OK you will have to confirm the action:
![]()
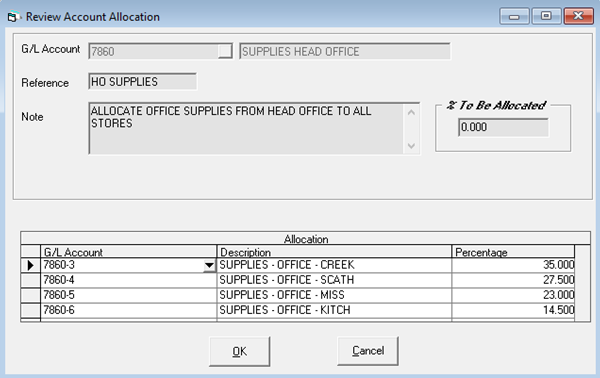
Review: This will review the selected account allocation.
Add: This will add a new account allocation.
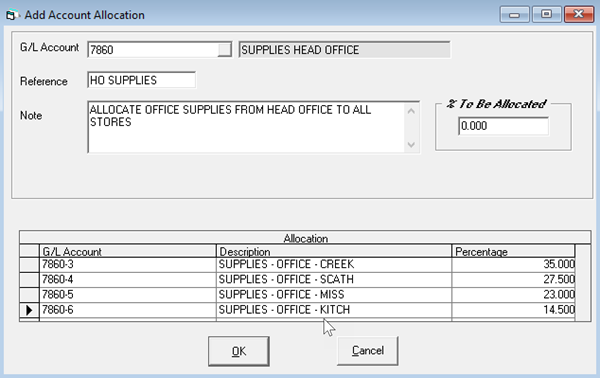
You need to setup each GL account you want to allocate to. In this case, the account 7860 is allocated to 7860-3, 7860-4, 7860-5, and 7860-6 at the percentages shown. After the transfer function, the value in 7860 will be zero. It will have been disbursed to the found accounts shown above.
Edit: Click to modify the allocation.

Delete: Click to delete the account allocation.

See Also:
January 18, 2023